Grocery store ingredients:
- Coconut Milk - you can find this in the Asian section of your grocery store, in a can. I recommend avoiding the light kind. I used the light kind and it could have used more richness.
- Amaretto - this is a liquer from the alcohol store, near the Schnapps
- Vanilla extract, to taste
- Optional:
- Cinnamon
- Nutmeg
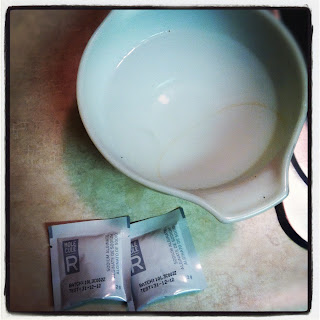
*Note I got all my additives from a Molecule-R kit, which I highly recommend if you are just starting out. The recipe calls for packets, so I converted the packet weights into grams. I have done some googling and while I haven't had to purchase any additional additives yet, Amazon seems to be a good source for addictives.
- Agar Agar (20g/1packet)
- Sodium Alginate (40g/2 packets)
- Calcium Lactate (50g/1 packet)
- Slotted spoon
- Silicone baking tray with boxes (or whatever shape you want) - I used a brownie bites tray from Fred Meyer
- Immersion blender
- Normal blender
- You can probably get away with one or the other, if you do not have both a normal and immersion blender
First, mix together 1 cup of coconut milk, 20g/1 packet of Agar-Agar, and vanilla to taste - I added a teaspoon or two. Add cinnamon and nutmeg to taste.
Bring ingredients to a boil and stir for a minute or so.
Let cool for a few minutes, then place mixture in a blender and blend until throughly mixed. I used a Magic Bullet for this. Pour mixture into silicone baking tray. My mixture made 11 squares. Then, set tray in refrigerator for thirty minutes - the coconut squares are finished.
Step 2: Alginate Syrup
Fill a bowl with 1 and 1/4 cups of water.
Add two packets of Sodium Alginate. Use your immersion blender to mix thoroughly.
This mixture turns into the texture of hair gel. VERY thick and very hard to wash off, so be careful you don't spill everywhere like I did. It is a PAIN to clean up.
Once mixed, bring the alginate syrup to a boil and stir for about one minute. Remove from heat and set aside for 10 minutes to cool.
Step 3: Amaretto + Alginate Syrup
Measure out 1/4 cup of your Alginate Syrup. The rest is leftover, which I stored in a tupperware container.
Add 1/4 cup Amaretto to the 1/4 cup of Alginate Syrup, and stir to mix.
Step Four: Calcium Lactate Bath and Rinsing Bath
Prepare two bowls. In one, mix together four cups of water and one packet of Calcium Lactate. In the other, fill with lukewarm water - this is your rinsing bath.
Step Five: Amaretto Pearls
Using a teaspoon, scoop out a teaspoon of the Amaretto mixture. Lower the teaspoon to the Calcium Lactate bath, dunk under, and turn the teaspoon over to release the mixture into the Calcium Lactate. I found this worked best when I dumped the Amaretto swiftly, rather than taking too much time (if you take too long to pour it out, it turns into a strand). You will get the hang of this - you do not have to be as gentle as you would imagine.
Pour all the your mixture into the Calcium Lactate bath, one teaspoon at a time.
When done, use a slotted spoon to transfer your pearls from the Calcium Lactate bath into the rinsing bath. Stir to rinse well.
Then, remove the pearls from the water bath. Again, you do not have to be as gentle as you would think. I popped a couple, but I was being pretty careless.
Also note I put my pearls together on a plate, and this was actually the hardest part - it was difficult to separate and get them off the plate. You might want to think of a better storage method, but I don't have one yet.
Look how awesome they look! They feel like the texture of a fish oil pill. The first one is an example of what happens if you take to long to pour out the teaspoon into the Calcium Lactate bath.
I made about 20 pearls.
Step Six: Assemble and Eat
When ready to eat, carefully pop out your Coconut Squares - this is when you will be thankful you used a silicone baking tray. If you aren't careful, they can break, but you don't have to be too gentle. The Coconut Squares have the texture of a firm tofu or an airy flan.
Then, place your pearls on top of the Coconut Squares, sprinkle cinnamon and/or sugar over the top, and Voila! Impress all your friends! Or just impress your self...either way, it is still pretty awesome. I can't believe it actually worked. The pearls look like little eggs yolks.
Note that when pierced with a fork (with a bit of pressure) the pearls pop and liquid spills out. Also, don't be nervous. I was using really vague instructions and it still turned out just fine. These are surprisingly easy.
THANKS MOM AND DAD FOR THE AMAZING PRESENT!


1 comment:
Wow! They look absolutely gorgeous!! I'm so glad you posted it to pinterest because I think a lot of people will want to try this out! Your explanations are way more involved and easy to understand than the ones online...can't wait to see more of your creations!
xox
Post a Comment